When it comes to pruning magnolias , my first piece of advice would be to call for yourself this question : Do I really NEED to ?
Not “ Do I need to ? ”
Or “ Should I ? ”

Fungal leaf spot is what I’m trying to avoid this summer.
But NEED .
If there ’s one affair you should know about magnolia is that they do n’t reply well to aggressive pruning . And this applies both to the evergreen magnolias and the deciduous single .
So why am I writing an clause on how to rationalise magnolias ?

Because for me , this year the answer to the “ Do I really NEED to ? ” question is YES ! And I ’m counting on the fact that the benefits of pruning my magnolia shrub will outweigh the possible downsides .
Here’s why I decided to prune my magnolia when all the experts say you should think twice and (maybe) prune once.
We ’ve had some very blind drunk years in my gardening zone , with showery fountain all the manner into late May . So over the retiring two summers , my magnolia has been cover in fungous leaf spot ( most likelyPhyllosticta sp . ) . The bed cover starts gradually at the end of May and beginning of June , then take hold of the entire shrub for the rest of the summer until the leaf depart fall in previous October .
Fungal leaf place will not kill the magnolia , but it wo n’t make it expect reasonably either . In theory , I get around six hebdomad of lucullan and fungus - free foliage . In practice , I have a sick - looking bush in my garden for most of the produce time of year .
The other trouble is that this magnolia shrub is pucker between a camellia and aSpirea japonica . Even though all these shrub are located on the gay side of the garden , the expectant they all grow , the more rugged choices I ’ll have to make .
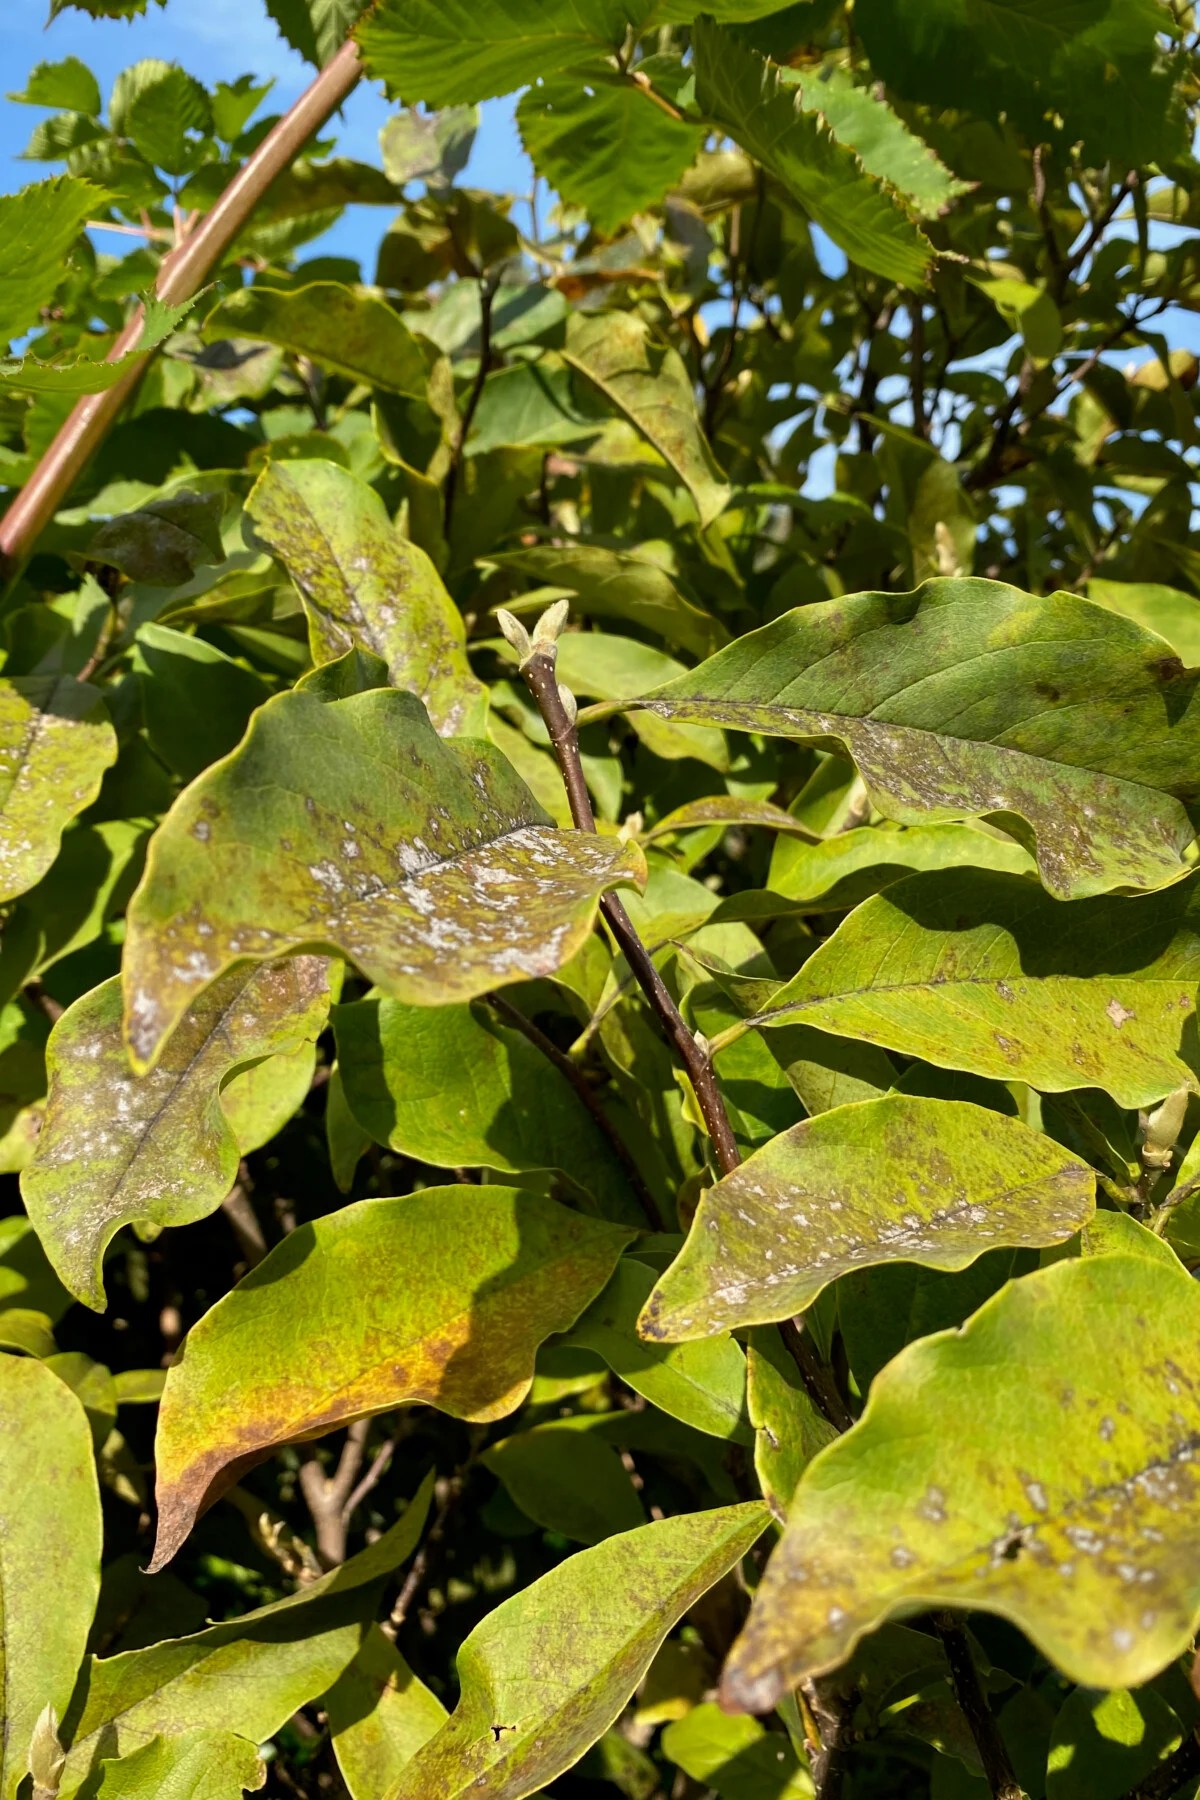
Fungal leaf spot is what I’m trying to avoid this summer.
I did n’t opt this shrub sandwich . I inherit the layout from the late owners of our theatre . And I suspect they planted the shrubs as young flora a absolutely fine distance asunder , but did n’t look to how large they would grow . ( Incidentally , that is mistake bit six on my list often perennial planting mistakes to avoidin spring . )
So I ’ve decide to work with what I ’ve get and make the best of this setup by thinning out the magnolia a bit to set aside the air to circulate more and hopefully foreclose some of the fungal bedspread .
When is the best time to prune my magnolia?
Like most shrubs that bloom early in the year , magnolia blooms on old woods . This stand for the cotton - candy - like blooms that I got to enjoy in March and April were already fructify on the offset late last summer and early fall .
So the best time to prune my magnolia is once these flowers are spent . In my garden , this translates to around mid - May .
This timing allow me to enjoy this year ’s bloom as long as potential ( includingharvesting the flower petals for consumption ) and thin out the branches way in advance of time before next year ’s buds bulge out to gear up in late summer .

This magnolia has outgrown its allocated space, but I don’t want to take out any of the shrubs.
3 Things I’m thinning out when I prune my magnolia.
1. I remove the basal shoots.
The basal shoots ( also known as sucker ) are the weak stems that originate from the crown of the shrub , all the way down at the soil story . They ’re the first to go because they unnecessarily crowd the plant from within .
This magnolia bush is at least seven – but most probable ten – years old . This mean that it has already developed strong leaders ( the quondam branches that give shape and social structure to the shrub ) . This , in twist , means that there ’s no need for the basal shoots to be direct into new leaders .
In other bush , such as some rose , the older leaders become unproductive and we necessitate to remove them every few years and prepare newfangled leaders . But it does n’t work this way with magnolia . The old leaders will continue to bloom just as profusely , so I ’ll just lead them in place and work around their shape .
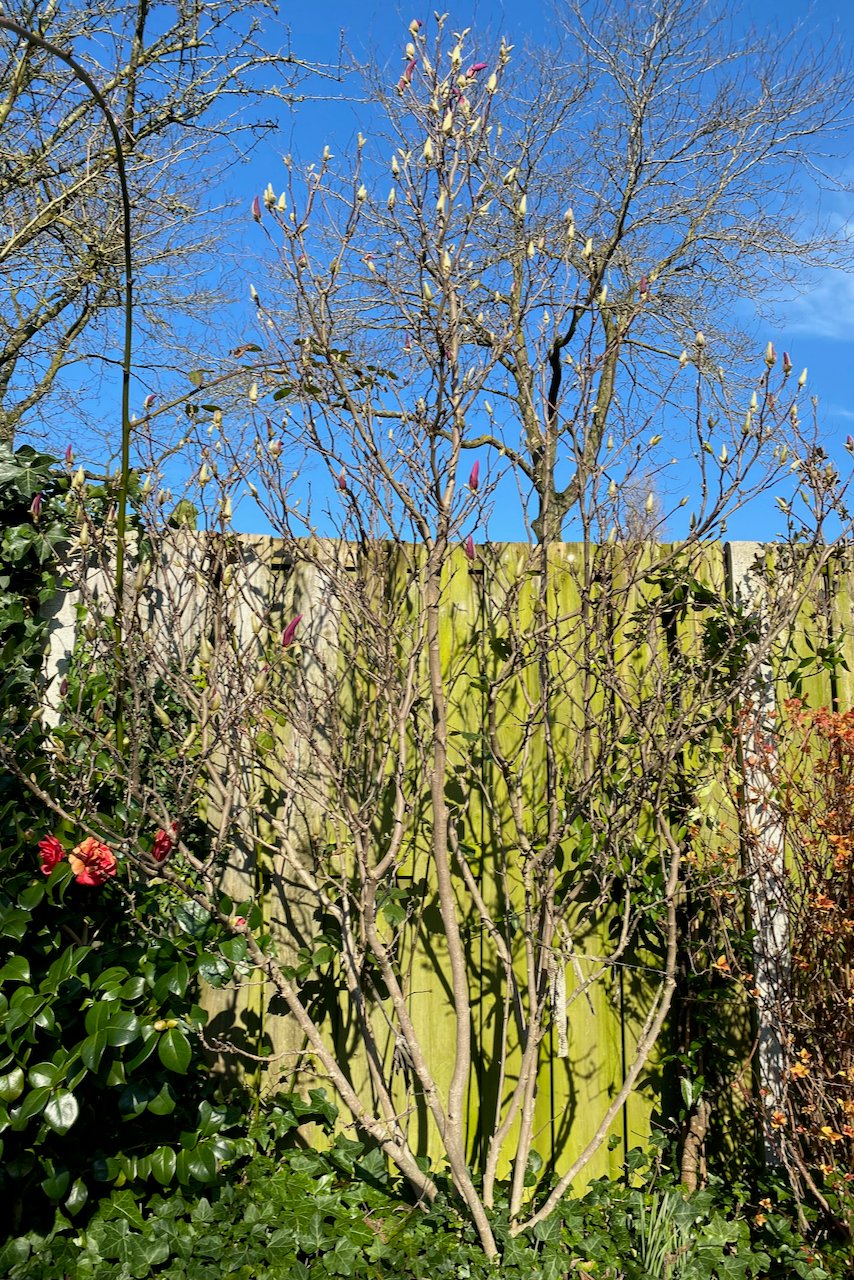
In early March (when we usually prune perennials), the buds were just beginning to open up.
So let ’s cut these suckers as low to the ground as possible .
2. I cut off the dead wood.
Even for this bush that ’s always within my line of sight in the garden , it contract a much close review to discover that it had a dyad of dead branch in the back , scratch against the fence .
They were completely juiceless so I did n’t even have to cut back them . They just tear off in my hand as I was trying to inspect them . I move back and made a clean cut of the stubs left behind .
3. I prune offshoots that rub against other leaders.
Here come the tricky part . I ’m starting to cut into perfectly level-headed and luxuriant leaf , so it find very counterintuitive .
But then again , I have to keep my pruning end front and center in my intellect : to thin out the emergence so as to ameliorate airflow and give the magnolia a chance in its battle against fungal infections . It ’s worth miss out on a few branch , I reckon .
First , I start by observe what subdivision fret against each other the most . Some only do when strong wind persuade the total human body , and those are the ace that I leave alone . Others visibly rub against each other one hundred percent of the time , so one of them must go . In some case , we may involve to prune off more than one .

In April, we got a lot of flowers on this magnolia.
Generally , I start by removing some subaltern branches ( the ones that inject off the leader ) and tertiary branches ( branch from the secondary arm ) . This lightens the canopy to provide more sunlight in . In turn , this will facilitate dry out off the dampness after a strand of rainy days .
I do n’t remove all of the secondary and tertiary branches , just the ones that rub against a main leg or another lower-ranking one .
And I always follow the one linguistic rule of ovolo for pruning magnolia : even when you have a pruning finish in mind , do n’t transfer more than a quarter of maturation . It will take too prospicient for the magnolia to bounce back , if it ever does .

Suckers are thin and originate from the base of the shrub. They’re the first ones to go.
Just by remove these three elements , I can already see ‘ through ’ the shrub a bit better .
Do you have five minutes to repurpose the pruned material?
If you already palpate spoiled that you ’ve hacked away at absolutely good branches , I have an mind that will make you feel better . ( At least , it helped me experience better ) .
you may treat ( some of ) the prunings as starter cuttings for new flora .
You wo n’t be able to utilize all the clip material , of course of action . So look for semi - hardwood that does n’t have a bud . The straighter your cuttings are , the more you could fit in your propagation container .

The dead wood snapped off at the top. So I just made a clean cut as close as possible to its point of origin.
I was able to pull together a handful of cut from the plant material I ’ve thinned off my magnolia .
I ’ve cut every section just below a leaf node , then scored the bark on the bottom of the cutting a bit to expose the layer underneath .
Then it ’s just a topic of sticking it in the ground – with at least one , but preferably more nodes buried below soil level . The foxy part is keeping it out of direct sun , and keeping the container moist enough but not too inert .

I think they rub each other the wrong way.
If you ’d like to follow a more in - depth tutorial on how to propagate cuttings , have a tone at the steps I describein this article on taking rhododendron cut .

These branches were rubbing against other secondary growth higher up.

I took a handful of cuttings and scored them at the bottom.
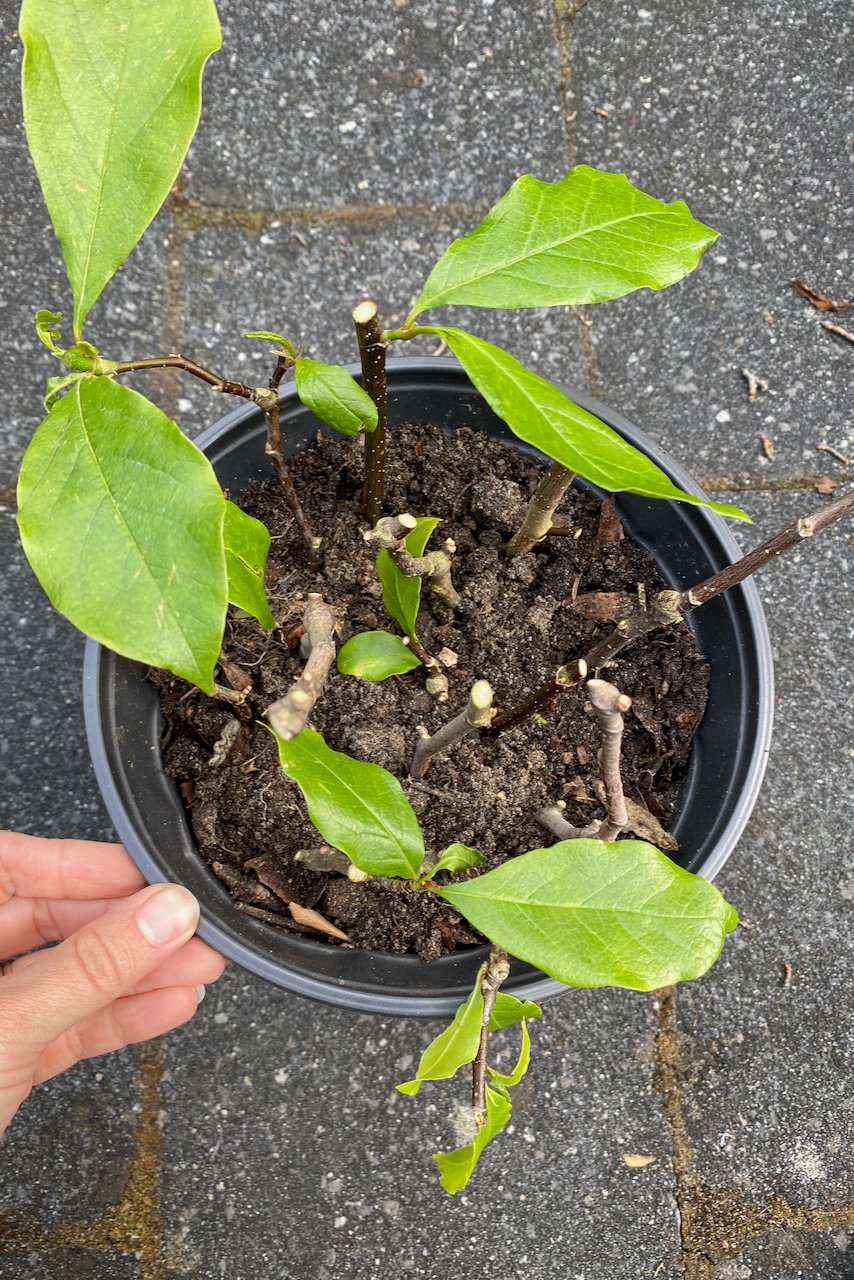
Keep the propagation pot out of direct sun.
